Time to decorate for Thanksgiving!

Friday, November 11, 2011


We are in the middle of packing up to move to a new house right now. Most of my thanksgiving decorations are out, but there are also a couple boxes in each room :) So I'm re-posting last year's post. Happy decorating!!


Last week I took down all my Halloween decorations and put up all my thanksgiving ones. Thanksgiving is such a fun time for me. It means lots of yummy food, good times spent with friends and family....and it's the precursor for Christmas! But before I can even think about Christmas I need to plan out my turkey day. And part of having a great turkey day is having a house that feels warm and welcoming and in my house that means lot of leaves. I think people can be a bit intimidated by decorating for thanksgiving. Don't be! Add those scarecrows and leaves! Here's how I decorated:

My welcome sign when I step in from the garage:


I always save pumpkins from October and use them to decorate for Thanksgiving. I also lite a lot of candles in the fall/winter, why not combine the two on a counter or side table?


A little pumpkin scarecrow, this one I positioned on some leaves.


My awkward steps above my fireplace..... I decorated them with pumpkins, scarecrows, lots of leaves and...


...a pumpkin turkey. What can I say, I thought he was cute!


See the hidden pumpkin behind the leaves???


I also like to decorate my china hutch. Everyone gathers in this area to eat and to be honest, it's a safe place for my Jim Shore woodcut figures.


I'm a little obsessed with Jim Shore woodcut figures...you'll see what I mean when I show you Christmas pictures...It's slightly "re-dunculous" as my hubby would say.


Cornucopia stuffed with leaves :) Simple and easy.


I even add a touch of leaves inside the hutch. It provides a nice pop of color and ties it all together.


I picked up this guy for $5 at my local craft store and the kids gave him a pilgrim hat :) I think we should name him.


Even our fridge is decorated. Turkey hand prints are the best! And so fun and easy. Just paint your hand with brown paint, then press on white paper. Glue feathers and ta-da! 


I purchased a bird houses at my local craft store and decorated it with fall colors and places it on top of my fridge. I'm not sure where this idea came from, but I like it.


Yes, my guest bathroom has fall towels and soap ;)


And I've replaced the real plants with a fall leaf assortment


My kitchen even gets a few touches


And Duke's treats


We made little American Indian pupets after reading a thanksgiving story. Simple craft and my kids love these guys! ....hmm....who knew.


And we can't forget our thanksgiving toys! :) The kids get really excited when they see these since they only come out of the garage once a year. Quick reminder: when storing seasonal toys remember to remove the batteries! 


I hope that gives you all a few ideas or maybe some Thanksgiving decoration inspiration! Happy decorating!! 

Halloween Recap

Friday, November 4, 2011

I'm so sorry I couldn't post sooner. I hope you all had a wonderful Halloween this year! Mine was a insane. I had a wedding cake due (next post) on the 29th and a carnival to set up for the neighborhood on the 30th... add in buying a house and the family getting sick. It was insane. And of course, now I'm sick :(  But here are some snapshots of our Halloween this year. And some of the new and improved witch shack!


Side view:


My wonderful hubby and myself :)


For the carnival, I made a witch head out of paper and taped it to an easel. I had bright green stickers for kids to "Stick the Wart on the Witch". I used a simple blindfold and voila! A great carnival game that ALL ages enjoyed. For the kidos under 2 I didn't use the blindfold. And all kids got to pick a prize out of my cauldron. 


The second game for the carnival that I made was a "Hole in One". I used cardboard boxes, black construction paper and some inexpensive fake grass that I purchased at my local home improvement store. This would work with golf balls and golf clubs too :)


Side View:


I cut a hole in the back that the ball would fit through if hit properly. I had my son do it so I knew it could be done. I wanted this game to be challenging, but not impossible. The really interesting thing about this game is that the ADULTS loved it too!!! I've never had adults want to do the carnival games, since we set it up for the kids... but apparently the desire to test their skills was too much :) It was lots of fun, inexpensive and fairly simple to make. All it takes is a little imagination!


I hope you all had a wonderful Halloween too! Now we're moving onto Turkey Day!!! Yay!!! :)
With Love,
Becca

Halloween Crafts for Kids

Thursday, October 13, 2011

Looking for a cute craft to do with your little ones? How about a Halloween Bat Finger puppet?? Just cut along the outside line and cut out the circles at the base of the bat and your kids can stick their fingers through to make legs for the bat ;) CLICK HERE for the Halloween Finger Puppet Bat Link.


And what is a Halloween Bat without clothes?? Have fun coloring and gluing these on. CLICK HERE for the Halloween Finger Puppet Bat Clothes Link.

Spooky Windows

Saturday, October 8, 2011


This week I've been busy decorating for Halloween. I'm posting a post I wrote last October since I'm doing this craft again. But this year, I've had trouble finding long rolls of black paper. I've substituted construction paper and just taped the seams together. Good luck with your spooky windows!!!! 

I've been working like crazy on my daughter's birthday party and I can't wait to show you all I've done. But I have to finish all of it first :) In the mean time I've also finished up my Halloween decorating. I did large window decorations that can be easily seen from the street. I went to a teacher's supply store and purchased 12 foot long black paper that's 2 feet wide. I flipped it on it's back and drew out a picket fence. 


I then drew a cat to go on the picket fence....and some bats in the "sky" above the picket fence. Anyway, you get the idea. You can draw or trace out a spooky scene on the flip side of the black paper. Then you cut out your scene. 

Here I am just beginning to cut :)

I have pull down black out curtain on those windows so I taped the scenes to that. But if you do not have anything on your windows I suggest taping it (with painters tape) to tissue paper so light can shine through! It'll create a very spooky effect. Although if it is for a kid's room maybe something a bit sturdier such as a sheet or even a large piece of white paper. It's so simple and so fun!

Getting Up Close & Personal With Wildlife...

Tuesday, September 20, 2011

Last night I let Duke out back to do his thing before bed and I heard him barking. Then I hear my husband yell, "Hunny! Look out the window, what do you see?!" My response.... "Really?....I don't see anything spectacular." Then he informs me that there was is a raccoon in our tree. I was interested after that information. I did see it from my window, but I timidly stepped outside to get a better look. ***Disclaimer: Wild animals should not be approached, they can carry diseases*** I did not approach the raccoon and the raccoon was up the tree so I was not close to it. But I had to snap a picture cause he was kinda cute.


This morning when I stepped out to go for a run, I did a thorough scan of the yard to make sure our night time visitor was gone.

But alas, there were more interesting little critters to watch out for on my run. Remember my post about the weather changing and it's feeling like fall...yea...well remember how I wrote about the orb spiders?? Well, they really are now everywhere. I have to be very aware when I'm running of where their webs are. This rather large spider was merrily working on a web about a foot from my face.


EEEEEEEEEEEeeeeeeeeeeeeeeeeeeeeeeeekkk!!!!! I think I've had plenty of wildlife for at least a week. I'll just hide out inside my house till Friday. LOL! Hope you all have a GREAT week!


With Love,
Becca


Fall is in the air...

Friday, September 16, 2011

I don't know where most of you are, but here in southern California you can feel the seasons changing. The past few mornings it's been very gloomy when I've woken up. One of my very favorite things about this time of year....besides crafts... is the fog that rolls down through the hills behind our house.


It makes me want to cuddle up with a good book under a blanket...but alas, there is way too much to do these days. I'm seriously thinking of getting a head start on some of my Halloween decorations. And I'm also thinking about spraying for spiders. I keep seeing this huge Orb Spiders on my runs and they are huge!

This is an orb spider, from Mike Nelson, who has a hilarious and terrifying encounter with these lovely San Diegan inhabitants.


They come in every year around fall, but I just cannot get used to them. I can see them hanging in their webs from the road when I'm driving. Eeek! It does make me slightly afraid to walk underneath the beautiful trees. Speaking of trees, they are starting to change! *Sigh* I just love this time of year!


As I'm snapping pictures of the fog, my animal kids are wondering what on earth I'm doing in the backyard. Hehe :)

An Angry Bird Card Template

Tuesday, September 6, 2011


This summer has flown by. I find that I've turned into one of those mothers who jump for joy when the school year starts back up. By the end of summer my 6 year old son was bouncing off the walls and I was hitting my head against the wall :) So now that I have time to breathe I am able to get you all some new templates to have fun with! My son just adores Angry Birds, but I could not find an angry bird card anywhere! So I just had to make one. It turned out to be much simpler than I thought it would be,
Here is the link to "The Bird Who is Angry" template.  All you need is red, black, yellow and tan (optional) paper, a stick of glue and a permanent marker. To make your card more professional use card stock. Enjoy!!

Summer...

Tuesday, July 19, 2011

What a crazy summer it's been so far! I can't believe how time is just flying away from me. There is obviously way too much going on. I've been trying to keep the kids busy and tire them out, yet it seems like I'm tiring me out. By bedtime I'm a zombie already. Well, school starts up next month - which is bittersweet. It was only a couple weeks ago that my son graduated from kindergarten. And next month I'll be packing lunch and he'll be at school for a full day (kindergarten here is only half day).  *sniffle*  But I did make my son and his friends a cute graduation cake for our block party we had. I put the school mascot (...if you'd call it that, it's a rocket ship) on the cake to show school spirit.


And the most notable of the summer (so far) was my son's beach birthday party. I think I'll be putting the invites under the templates on my website. And I'm planning on doing a post about Beach Birthday Parties- it'll include invite templates, cake and cupcake ideas (see pictures below) and party favor ideas.


Taking the long road...

Monday, June 6, 2011

There has been so much going on recently. It's been the type of stuff that takes lots of time too. Not just the easy sweep it under the rug type of stuff. Oh no! This is the vacuum it, re-vacuum, steam clean it and scrub it too type of stuff.... like my cleaning analogy? It just seems like every little task ends up taking hours. Do you ever have days like that??

                                  (picture of my beheaded cable, this is before head fell completely off)

Recently my laptop charger was beheaded. It was a very sad day when I realized that my cable was no longer charging the laptop. My laptop's battery is totally dead too. Gosh, my technology is so morbid! So anyway, my laptop will only work if plugged in... and if my cable isn't working, my laptop is useless! So I had to wait, and wait..... and wait until my wonderful mail person dropped off a wonderful package today. Now I'm back online! And today is really looking up! I really hope today is a "looking up" kind of Monday for all of you too!
With love, Becca

A morning in Paris...

Tuesday, May 31, 2011

I'm sorry I haven't been blogging for a while. I've been battling a horrible coughing cold for the past week. My head has been pounding and the coughing attacks just put me over the edge...Thank goodness for DayQuil!

Well, this past weekend it all started to look up! I know I'm starting to feel better when I want to bake and cook. To celebrate Memorial Day I decided to make strawberry crepes. I LOVE crepes! And I wanted to surprise my hubby...he loves crepes too :) It worked out perfectly too because I feed the kids before and then put them in front of the electronic babysitter (aka T.V) and got to work on making them. The kids even let us eat them in peace. I felt like I was in Paris while I sipped on my steam milk with espresso and munched on strawberry crepes with my husband. It was wonderful! Ready to know how you can make these at your home?


Becca's Strawberry Crepes:
1 cup all purpose flour
2 teaspoons sugar
2 Tablespoons of melted butter (you'll need more for cooking)
1 1/2 cups milk
2 large eggs


Combine all of the above ingredients in the order listed. Whisk together until smooth and let stand for 10 minutes. Put 1- 2 Tablespoons of butter in the bottom of your skillet. Cover the bottom and a little up the side of the pan with butter. Add about 1/3 a cup of batter and swirl it around in your pan so it forms a smooth, even circle. When bubbles start forming or your butter underneath the crepe starts bubbling it's time to flip (usually about 1-3 minutes). Use a thin butter knife to lift the edge of the crepe and slide a spatula underneath. Next tip your pan and flip your crepe. Once your crepes are cooked you can work on your filling.


Filling options:
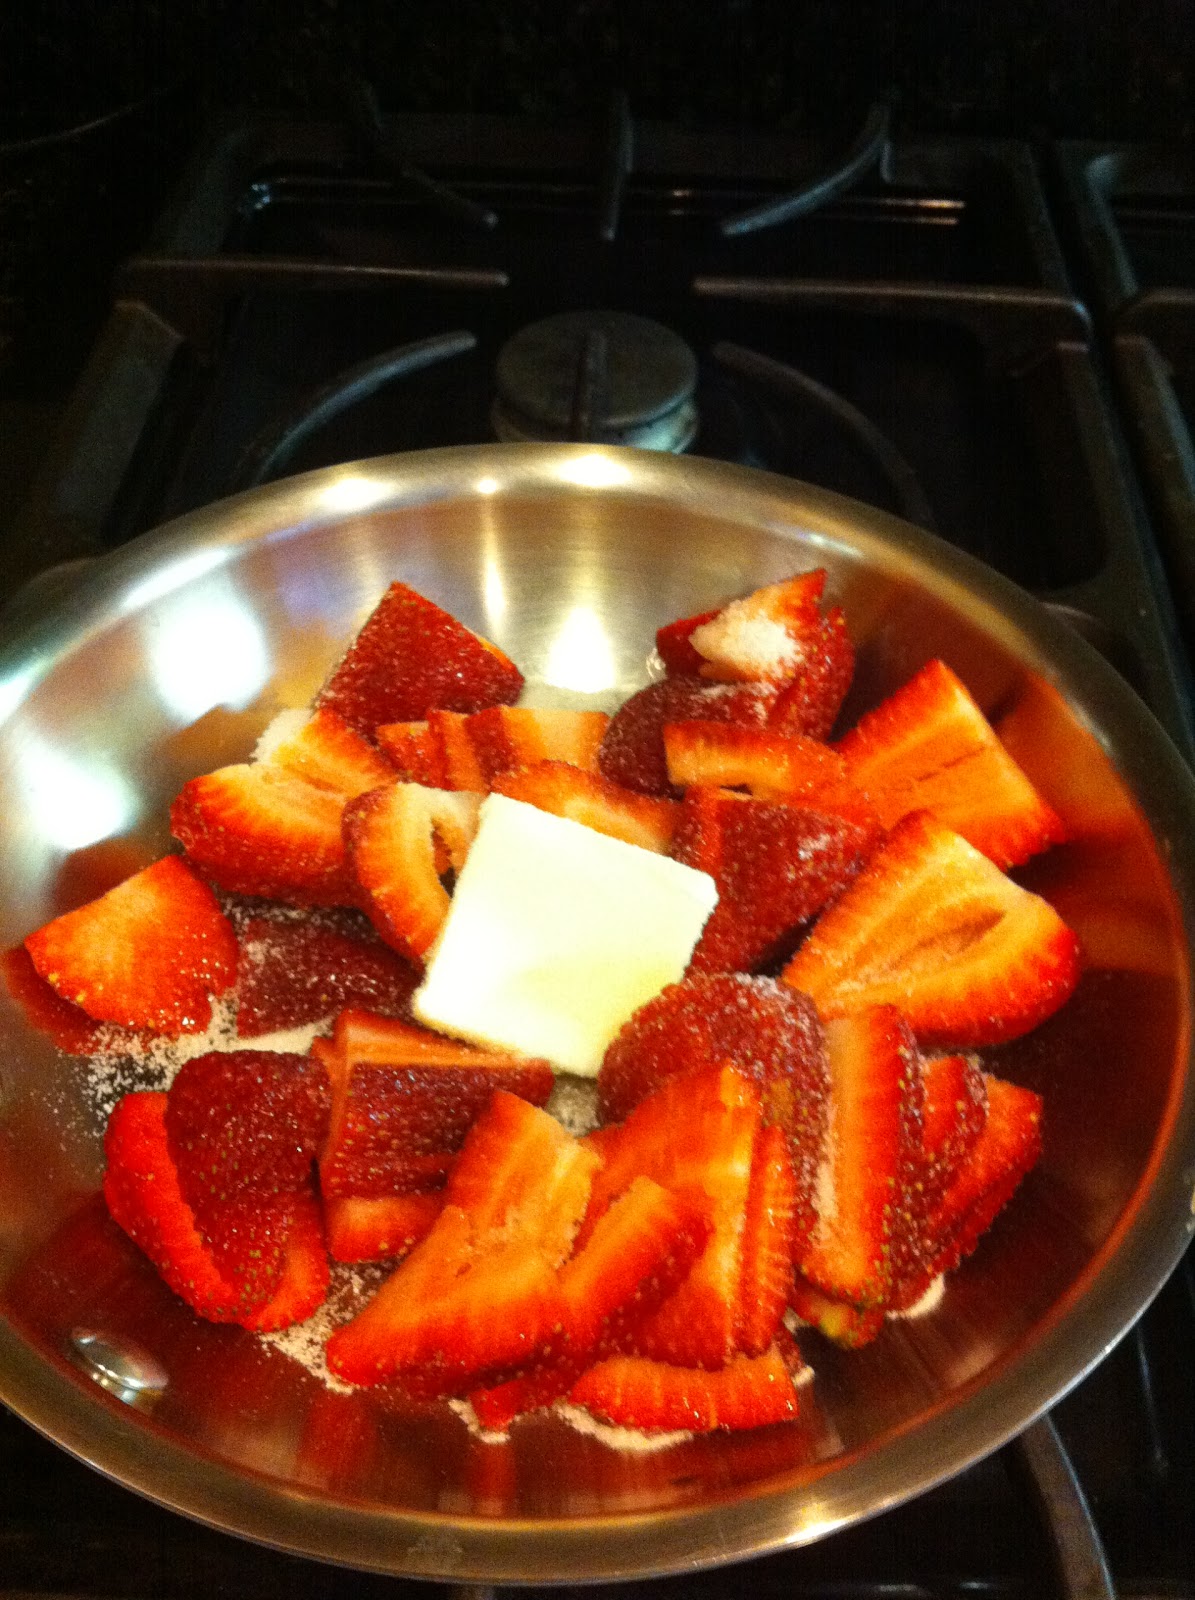
Nutella spread on the bottom of the crepe for a decadent hazelnut, chocolate flavor. I slice up strawberries, sprinkle with sugar, add a tablespoon of butter to a pan and cook over medium low heat. Then I spoon the strawberry mixture into the crepe and roll it up.

Lastly I dust with powdered sugar and place some of the fruit filling ontop. I also recommend steamed milk with espresso ;) I hope you enjoy them as much as we did, with love, Becca

My Husband's Birthday Extravaganza

Tuesday, May 10, 2011


Today, I'm taking it easy. This weekend it seems like I celebrated non-stop. Seriously. Friday night was an adult night out with friends for my husband's birthday. Saturday night we went to a hullabaloo concert with the kids. Sunday we celebrated Mother's Day with a nice walk along the lake....and then a nice dinner with the rest of the family. And last, but not least we hosted a neighborhood party for our friends with kids to celebrate my husband's birthday. OH MY!!! It's been a whirlwind, but I wouldn't change any of it for a second ;) It was lots of fun. I made my husband's favorite Bananas Foster Cupcakes to celebrate. Oh, were they yummy! There's always a reason to celebrate and a yummy little cupcake makes it so much sweeter. Who knows, maybe I'll keep the celebration going and celebrate Wednesday tomorrow.....hmmmm.....I wonder what Wednesday cupcakes would taste like!

New Projects

Friday, May 6, 2011


This week has been a busy one for me. It seems like this year has just been getting busier and busier. I can't wait till summer....although I have a feeling that once summer is here it will be over before I know it. I'm not sure how you all handle stress but I love to paint. I haven't painted for a very long time. Between carpools, play dates, food to make, appointments to keep, kids to pick up after, who has time?! This week I made time...and I'm very happy I did. I put a movie on and I took a couple hours to paint.


My little brother in law is moving into a new apartment and asked me to paint him a modern/abstract painting to go in the living room. I don't usually paint modern but I was very excited to paint for him. He bought me three canvases to paint on- it was a lot of fun. Art doesn't have to be perfection. It doesn't HAVE to be anything. Art is what you make it. To be completely honest with you I had no idea what i was painting when I started. It just kinda flowed out of my soul as I went along. If you've never painted - try painting an abstract painting.... it's never wrong, it's just yours. Hopefully this will inspire someone out there. Here's my painting.


....I hope he likes it!