Showing posts with label tips. Show all posts

Pumpkin Pie 101- Pie Filling

Monday, September 27, 2010


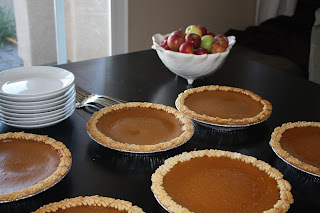
Pumpkin Pie is really an easy pie to make. There's no tempering of the eggs to worry about. Basically you just mix the ingredients together, pour into the shell and bake. I think the filling of a pie is as unique as the person making it. For instance, I love flavors. I'm a big spice person so I like to go a little heavy with my spices. When I was growing up my mom used to tell me to add "heaping" teaspoons of spice... that means the teaspoon looked like it had a small mountain of spice in it :) That little teaspoon was literally was holding all it possibly could. But a good friend of mine prefers to go light on her spices and add some orange zest to her pies. Feel free to experiment with your fillings. The important thing is having a good base recipe for your pies and then you can play around with the amount of spices and flavors you add. 


Here's my good base recipe (makes 2 pies):
A large can of Libby's Pumpkin (29oz)
2 cans evaporated milk
4 eggs
1 1/2 cups sugar
Add spices to taste.... here's where I can't divulge what spices I use in my own pies :) 

But I gave you an excellent base to begin with. Your pie will be rich and creamy. Follow my cooking instructions on the pie crust post and you're sure to have an award winning pie! 


Have fun baking!

Pumpkin Pie 101 - The Pie Crust

Thursday, September 23, 2010

One of my bakery's most popular items is my pumpkin pie. Pumpkin pie is one of those deserts I wait all year for. Once football season has started I know it won't be too much longer till I can have that first slice of pumpkin pie. I love pumpkin pie! I have wonderful memories of waking up on Thanksgiving morning and eating pumpkin pie while watching the Macy's Thanksgiving Day Parade. Let's face it, pumpkin pie is amazing. And you can make your pumpkin pie even more amazing with a few simple tricks. 


Before I start mixing ingredients I work on the crust. Some of you prefer your own dough and some of you prefer the store bought dough. Either one will work. One suggestion: if you don't make your own crust frequently and don't have a favorite recipe for a crust then save yourself the hassle and just buy the pre-made dough. Also go ahead and spend the extra dollar and buy the name brand one. It tastes good and your guests will never know it's not made from scratch :)


Big Tip #1:
The key to my crust is the leaf design. I use pie crust cutters that leave a leaf pattern and cut out in the dough. 


I punch out about 30 leaves to put on the edge of my crust. After I've laid the dough in the pan I dip my finger in water and run it around the edge of the dough. I lay the leaf cutouts around the edge. Ta- Da! Done. See, I told you it was easy. The key to the design is really the "pie crust cutters." 


Big Tip #2: 
I put the pies in the oven once they are filled at 400 degrees for 10 min. 


Then I turn the temp down to 350 and I put "pie crust shield" on the crust. Pie crust shields are basically large circles of metal that go on your crust and have a big open circle in the middle so your pie can cook without burning your crust. If you do not have these, foil on your crust will prevent your crust from browning too much or burning. I then continue cookie the pies for about 45 min. 


In the next post I'll talk about the filling :)

A New Course....

Sunday, September 19, 2010

Recently my bakery (www.beccasbluebakery.blogspot.com) has been very busy. I found myself up till 2am multiple nights in a row to get cakes done. I was very proud of what I did but I found it very hard to keep up with the demand while still being a wife and mom. I also had another blog that I'd post on periodically (www.beccastopsyturvytales.blogspot.com). I realized that the posts that I really enjoyed were the ones where I was showing how to make a craft or a recipe. Those were my thoughts in creating this blog...

I'm going to be showing you the crafts I do to make my house a home....and I'll be showing you how to do them too. I'm also going to be showing you tips and tricks to get your baked goods to look like mine. I love sharing these tips with my friends and I'm really excited to be showing you how to do them too. I hope you enjoy this new blog!